
The community edition of EVE-NG pre-built OVA comes with a 40G disk.
There are instructions on how to extend this by adding additional disks, however, I wanted to maintain a single disk and expand it to a larger size.
Below are the instructions on how to safely accomplish this without loosing data.
1 — Expand the disk via your virtualization software.
In this example, we are using VMware Workstation.
- Power off / shutdown your virtual machine if it is already running.
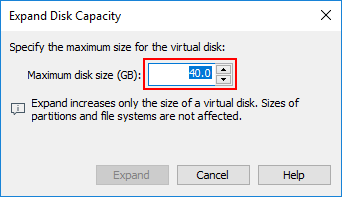
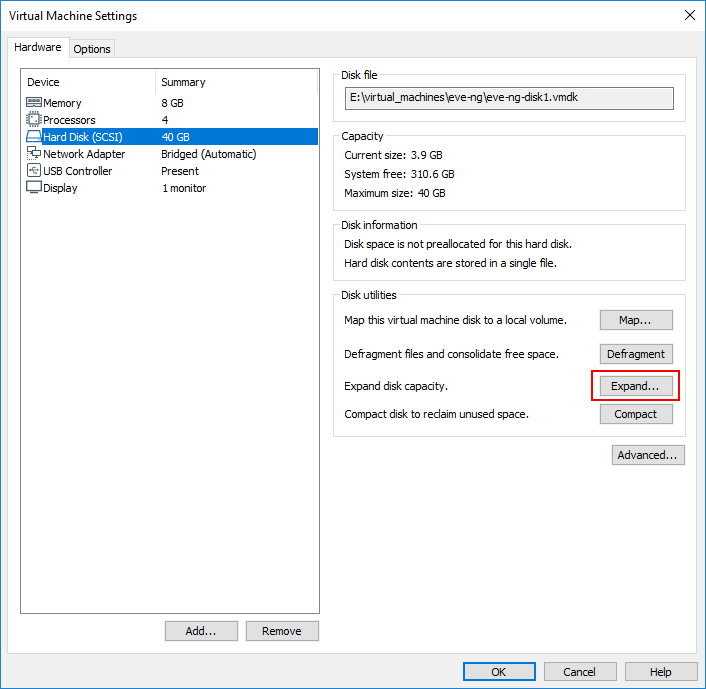
- Via your virtualization software, edit the virtual machine settings and select the disk.
Once selected, press the [ Expand ] button.
![]()
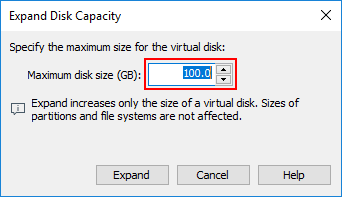
- The default disk size is 40G. In this example, we wanted to expand the base disk to 100G to fit all of our data.
Simply change the value from 40G to 100G and press the [ Expand ] button to process the changes.
- Once the expand is completed, you will see the confirmation window. Press the [ OK ] button and then press the [ OK ] button again on the VM settings dialog.
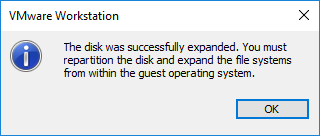
- Power your virtual machine back on.
2 — Expand the disk within the EVE-NG Operating System (Ubuntu 16)
The EVE-NG system provided via the OVA uses LVM backed disks. Many people are not familiar with LVM partitioning and management, so I have tried to keep these instructions as simple and understandable as possible.
LVM Volumes still rely on the /dev/sda1partitioning system, so we must first expand this partition on the system.
1 – Confirm that your system is showing the correct size that you expanded your disk to by running the command fdisk -l /dev/sda
# fdisk -l /dev/sda

Disk /dev/sda: 100 GiB, 107374182400 bytes, 209715200 sectors
Units: sectors of 1 * 512 = 512 bytes
Sector size (logical/physical): 512 bytes / 512 bytes
I/O size (minimum/optimal): 512 bytes / 512 bytes
Disklabel type: dos
Disk identifier: 0x2c908394

Device     Boot   Start      End  Sectors  Size Id Type
/dev/sda1  *       2048   999423   997376  487M 83 Linux
/dev/sda2       1001470 83884031 82882562 39.5G  5 Extended
/dev/sda5       1001472 83884031 82882560 39.5G 8e Linux LVM
2 – Now we need to rebuild the partitions to include the new disk space allocation. This part might seem a bit scary, because we are going to delete some of the existing partitions and then rebuild them. You can do this one of two ways. #1 – Using the script provided or #2 – manually doing the commands.
- We have put together a quick script that will run through the entire fdisk command set just by simply copy / paste the lines to your SSH session.
fdisk /dev/sda <<EOF
d
5
d
2
n
e
2


n


t
5
8e
w
EOF
Explanation of what this is doing:
* Delete partition #5
* Delete partition #2
* Create a new “extended” partition, but using the newly detected size
* Create a new “logical” partition, but using the newly detected size (will start at the same block number as the previous partition scheme)
* Set the partition type to Linux LVM
* Write the changes - If you would prefer to manually run through the disk partition changes, just execute the command
fdisk /dev/sdaand perform the following steps.- Delete partition #5 >> d, 5
- Delete partition #2 >> d, 2
- Create a new “extended” partition using the newly detected disk start block >> n, e, 2, enter, enter
- Create a new “logical” partition using the newly detected disk start block >> n, enter, enter
- Set the new disk type to “Linux LVM” >> t, 5, 8e
- Write the changes to the disk
After writing the changes, regardless of the method used, you should see output similar to the following:
Welcome to fdisk (util-linux 2.27.1).
Changes will remain in memory only, until you decide to write them.
Be careful before using the write command.


Command (m for help): Partition number (1,2,5, default 5):
Partition 5 has been deleted.

Command (m for help): Partition number (1,2, default 2):
Partition 2 has been deleted.

Command (m for help): Partition type
   p   primary (1 primary, 0 extended, 3 free)
   e   extended (container for logical partitions)
Select (default p): Partition number (2-4, default 2): First sector (999424-209715199, default 999424): Last sector, +sectors or +size{K,M,G,T,P} (999424-209715199, default 209715199):
Created a new partition 2 of type 'Extended' and of size 99.5 GiB.

Command (m for help): All space for primary partitions is in use.
Adding logical partition 5
First sector (1001472-209715199, default 1001472): Last sector, +sectors or +size{K,M,G,T,P} (1001472-209715199, default 209715199):
Created a new partition 5 of type 'Linux' and of size 99.5 GiB.

Command (m for help): Partition number (1,2,5, default 5): Partition type (type L to list all types):
Changed type of partition 'Linux' to 'Linux LVM'.

Command (m for help): The partition table has been altered.
Calling ioctl() to re-read partition table.
Re-reading the partition table failed.: Device or resource busy

The kernel still uses the old table. The new table will be used at the next reboot or after you run partprobe(8) or kpartx(8).
3 – Now we need to update the operating system so that it is aware of the disk partition changes. The simplest method is to execute the command partprobe
4 – Now you should confirm that the operating system has detected your partition changes. Re-run the command fdisk -l /dev/sda
# fdisk -l /dev/sda
Disk /dev/sda: 100 GiB, 107374182400 bytes, 209715200 sectors
Units: sectors of 1 * 512 = 512 bytes
Sector size (logical/physical): 512 bytes / 512 bytes
I/O size (minimum/optimal): 512 bytes / 512 bytes
Disklabel type: dos
Disk identifier: 0x2c908394

Device     Boot   Start       End   Sectors  Size Id Type
/dev/sda1  *       2048    999423    997376  487M 83 Linux
/dev/sda2        999424 209715199 208715776 99.5G  5 Extended
/dev/sda5       1001472 209715199 208713728 99.5G 8e Linux LVM
5 – Now that you have confirmed the disk partition is accurate, we can expand the LVM physical volume and then the logical volume.
- Expand the physical volume group by entering the command
pvresize /dev/sda5>>> OUTPUT <<< Physical volume "/dev/sda5" changed 1 physical volume(s) resized / 0 physical volume(s) not resized
- Expand the logical volume group by entering the command
lvextend -l +100%FREE /dev/eve-ng-vg/root>>> OUTPUT <<< Size of logical volume eve-ng-vg/root changed from 31.52 GiB (8069 extents) to 91.52 GiB (23429 extents). Logical volume root successfully resized.
- Resize the logical volume group file system tables by entering the command
resize2fs /dev/eve-ng-vg/root>>> OUTPUT <<< resize2fs 1.42.13 (17-May-2015) Filesystem at /dev/eve-ng-vg/root is mounted on /; on-line resizing required old_desc_blocks = 2, new_desc_blocks = 6 The filesystem on /dev/eve-ng-vg/root is now 23991296 (4k) blocks long.
6 – Now you should have additional disk space available on your root partition. To confirm this, execute the command df -h to see available disk space / free space.
# df -h

Filesystem                    Size  Used Avail Use% Mounted on
udev                          3.9G     0  3.9G   0% /dev
tmpfs                         799M   14M  785M   2% /run
/dev/mapper/eve--ng--vg-root   90G  2.3G   84G   3% /
tmpfs                         3.9G     0  3.9G   0% /dev/shm
tmpfs                         5.0M     0  5.0M   0% /run/lock
tmpfs                         3.9G     0  3.9G   0% /sys/fs/cgroup
/dev/sda1                     472M   83M  365M  19% /boot
You have now completed the disk expand procedure of your EVE-NG server.